인터넷을 검색해서 특정 단어를 검출하고 가공하는 다양한 방법이 있다.

내가 하려고 하는 것은 매일 특정 기업의 기사를 검색하고
이 기사에 대해서 한눈에 볼 수 있도록 하는 것이다.


즉, 디즈니 관련 오늘 기사를 검색해서 
제목과 링크를 수집하는 코드를 작성해 보려고 한다. 


여러가지 웹 크롤링 방법이 있었지만
최종적으로 선택한 것은 "구글 피드"를 활용하는 것이다. 

셀레니움이나 다른 라이브러리를 사용하는 것도 좋겠지만
내가 사용하는 라즈베리파이 환경에서는 호환성 문제가 있었다
또한 간혹 페이지마다 크롤링을 막아 놓은 경우가 있고
단순하게 기사 제목과 링크 정도만 수집할 것이라
최대한 간단하게 구현할 수 있는 것이 좋다고 생각했다. 

전체 소스 코드는 아주 간단하다. 

(1) 오늘 날짜의 파일을 생성하고 "disney_news_2023-06-08.txt"
(2) 구글 rss feed 를 통해 기사를 검색한 뒤
(3) 제목 - 출처, 기사의 링크를 파일에 저장한다.  
import datetime
import feedparser

# 현재 날짜 얻기
today = datetime.date.today()

# Disney 관련 뉴스의 Google RSS 피드 URL
rss_url = 'https://news.google.com/rss/search?q=Disney&hl=en-US&gl=US&ceid=US:en'

# RSS 피드 가져오기
feed = feedparser.parse(rss_url)

# 오늘 날짜의 Disney 관련 뉴스를 저장할 파일 이름
filename = f"disney_news_{today}.txt"

# 오늘 날짜의 Disney 관련 뉴스를 파일에 저장
with open(filename, 'w', encoding='utf-8') as file:
    for entry in feed.entries:
        # 기사 게시 날짜 가져오기
        published_date = entry.published_parsed
        article_date = datetime.date(published_date.tm_year, published_date.tm_mon, published_date.tm_mday)

        # 오늘 날짜와 비교하여 동일한 경우에만 파일에 저장
        if article_date == today:
            title = entry.title
            file.write(f"{title}\n")
            file.write(f"link {link}\n")

print(f"오늘 날짜의 Disney 관련 뉴스가 '{filename}' 파일에 저장되었습니다.")


실행 결과 : disney_news_2023-06-08.txt


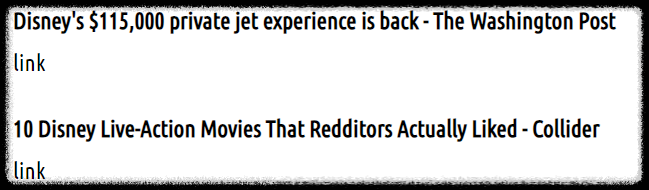
이제 파일로 저장한 내용을 자동으로 티스토리에 업로드 하도록 구성하면된다. 
이렇게 하면 매일 디즈니와 관련된 기사를 티스토리에 모아 둘 수 있게 된다. 

티스토리에 글을 작성할 경우 주의 사항은  HTML 문법 형태로 저장하여야 한다.
줄바꿈 <br> 등을 삽입하지 않으면 한 줄로 나열된 형태로 
글이 포스팅 된다. 

아래는 개행을 추가 하고 제목은 글씨를 두껍게 하도록 HTML 코드를 추가한 것이다.

import datetime
import feedparser

# 현재 날짜 얻기
today = datetime.date.today()

# Disney 관련 뉴스의 Google RSS 피드 URL
rss_url = 'https://news.google.com/rss/search?q=Disney&hl=en-US&gl=US&ceid=US:en'

# RSS 피드 가져오기
feed = feedparser.parse(rss_url)

# 오늘 날짜의 Disney 관련 뉴스를 저장할 파일 이름
filename = f"disney_news_{today}.txt"

# 오늘 날짜의 Disney 관련 뉴스를 파일에 저장
with open(filename, 'w', encoding='utf-8') as file:
    for entry in feed.entries:
        # 기사 게시 날짜 가져오기
        published_date = entry.published_parsed
        article_date = datetime.date(published_date.tm_year, published_date.tm_mon, published_date.tm_mday)

        # 오늘 날짜와 비교하여 동일한 경우에만 파일에 저장
        if article_date == today:
            title = entry.title
            link = entry.link
            file.write(f"<p>")
            file.write(f"<b>")
            file.write(f"{title}\n")
            file.write(f"</b>")
            file.write(f"<br>")
            #file.write(f"link {link}\n")
            file.write(f"<a href = {link} target="_blank"> link\n")
            file.write(f"<br>")
            file.write("</p>")

print(f"오늘 날짜의 Disney 관련 뉴스가 '{filename}' 파일에 저장되었습니다.")


추가로 진행할 것은 제목을 한글로 번역하고 
매일 티스토리의 카테고리에 업로드 할 수 있도록 구성하면 되겠다. 


2023.06.08 - [AI & 자동화/API_Contents] - disney_news_2023-06-08


disney_news_2023-06-08

Disney's $115,000 private jet experience is back - The Washington Post link 10 Disney Live-Action Movies That Redditors Actually Liked - Collider link Disney expert shares summer Disneyland tips, discounts and what's new - KGO-TV link Disney World Drops a

bard-google.tistory.com


■ 이전 글을 통해서 access_token 을 얻게 되었다.  https://bard-google.tistory.com/17


티스토리 api 자동 글쓰기 1 ( access_token )

access_token 정보만 있으면 자동으로 글을 업로드 할 수 있다는 것은 알게 되었다. 그렇다면 access_token 은 어떻게 얻을 수 있을까?? access_token 을 얻기 위에서는 다음과 같은 절차를 따른다. 1. App ID +

bard-google.tistory.com


■ 티스토리 Open API 사이트에 가보면 할 수 있는 것들이 나열되어 있는데 

  대표적인 것이 글목록, 읽기, 쓰기, 수정, 파일 첨부, 댓글 기능이다.  (https://tistory.github.io/document-tistory-apis/ )


 이번에 해볼 것은 내 티스토리 블로그의 글 목록을 가져오는 파이썬 코드를 작성하여 테스트를 진행해 보려고 한다. 

다른부분은 수정할 것이 없고 access_token 에 access_token 값을 넣고 

blog_url 에 내 티스토리 블로그 주소를 넣어 주면 된다. 

import requests

def get_tistory_posts(blog_name, access_token):
    url = f'https://www.tistory.com/apis/post/list?output=json&blogName={blog_name}&access_token={access_token}'

    response = requests.get(url)
    data = response.json()

    if 'tistory' in data and 'item' in data['tistory'] and 'posts' in data['tistory']['item']:
        posts = data['tistory']['item']['posts']
        for post in posts:
            post_id = post['id']
            title = post['title']
            print(f"Post ID: {post_id}")
            print(f"Title: {title}")
            print('---')
    else:
        print('No posts found.')

# 사용 예시
blog_name = 'YOUR_BLOG_NAME'
access_token = 'YOUR_ACCESS_TOKEN'

get_tistory_posts(blog_name, access_token)


위와 같이 파이썬 코드를 작성 후에 실행하면 목록을 불러 오는 것을 확인 할 수 있다. 

API를 통한 목록 불러오기 결과


디테일한 사항은 API 사이트를 통해서 확인할 수 있다. 

https://tistory.github.io/document-tistory-apis/apis/v1/post/list.html


글 목록 · GitBook

No results matching ""

tistory.github.io


 access_token 값을 통한 API 가 잘 동작하고 있다는 것을 확인했다.

access_token 정보만 있으면 자동으로 글을 업로드 할 수 있다는 것은 알게 되었다. 

그렇다면 access_token 은 어떻게 얻을 수 있을까??


access_token 을 얻기 위에서는 다음과 같은 절차를 따른다.

1. App ID  +  Secret Key  를 통해서 Code 값을 얻고

2. Code   값을 통해서 Access_token 값을 구한다. 


1. AppID 와 Secret Key 얻기


1. 인증사이트 접속하여 등록하기  (https://www.tistory.com/guide/api/manage/register)  

 사이트에 접속해서 아래와 같이 기입한다. 

작성후에 App ID 와 secret key 를 얻게 된다. 

등록후에는 이와 같이 App ID 와  Secret Key 값을 얻을 수 있다. 


2. 접근 허가 하기 

 아래 형태로 메모장에 작성후  인터넷 url 창에 입력 후  <허가 하기>

https://www.tistory.com/oauth/authorize?

client_id={client-id}                              <= App_ID  

&redirect_uri={redirect-uri}                 <=내 블로그 주소 

 &response_type=code
 &state={state-param}


허가하기 버튼을 누르면 URL 창이 바뀌면서 code 값을 얻을 수 있다.   (URL 창을 닫지 말고 확인)

https://api-bard.tistory.com/?code=f5d26f1ee0...........0179361ff313c6f8c&state= {state-param}


3.  Access_token 얻기

 App ID 와  Secret Key 값을 알면 Access_token 을 얻을 수 있다. 

메모장을 열어서 아래 값을 변경해서 넣어 둔다. 

https://www.tistory.com/oauth/access_token?

client_id={client-id}                              <= App_ID  

&client_secret={client-secret}            <= Secret Key

&redirect_uri={redirect-uri}                 <=내 블로그 주소 

&code={code}                                     <=인증 후 받은 code 값

&grant_type=authorization_code


위 와 같이 준비된 상태에서 내 블로그를 들어간 다음 F12를 누르고 network 탭으로 간다. 

3-1) 내블로그 -> F12 -> Network 탭

3-2) 주소창메모장에 적어둔 내용을 기입


주소창에 입력 후 엔터를 누르면 아래와 같이 창이 바뀐다.  


status 가 200이면 정상적으로 access_token 이 발급된 것이다.  (400 은 에러 발생한 것)


이 토근값을 가지고 있으면 내  티스토리 API 에 접근할 수 있으므로 분실하지 말고 잘 보관해야 한다. 


블로그에 자동으로 글을 업로드 하는 방식을 찾아 보는 중이다. 

내가 필요로 하는 자료를 자동으로 내 블로그에 기록할 수 있으면 좋겠다. 

 예를 들면 관심있게 보고 있는 기업에 대한 report 가 업데이트 되거나 

기사가 발행되면 자동으로 내 블로그에 업로드 할 수 있도록 한다면

정보 수집을 하는 시간을 줄일 수 있 수 있을 것 같았다. 

열심히 검색을 해보니 다행히 정보가 많아서 생각보다는 쉽게 가능성을 확인 했다. 


테스트가 완료 된 코드는 아래와 같다. 

import requests

def upload_to_tistory(title, content, access_token, blog_name):
    url = f"https://www.tistory.com/apis/post/write?access_token={access_token}&output=json"
    params = {
        "title": title,
        "content": content,
        "visibility": 0,  # 0: 비공개, 1: 보호, 3: 발행
        "blogName": blog_name,
    }

    response = requests.post(url, data=params)
    if response.status_code == 200:
        print("글이 성공적으로 업로드되었습니다.")
    else:
        print(f"글 업로드 실패. 응답 코드: {response.status_code}")
        print(response.text)

# 업로드할 글의 제목과 내용 설정
title = "GPT"
content = "<p>GPT3</p>"

# Tistory API에서 발급한 액세스 토큰과 블로그명 설정
access_token = "여기에 토큰 값 넣고 "
blog_name = "여기에 블로그 주소 넣고 "

# 티스토리에 글 업로드
upload_to_tistory(title, content, access_token, blog_name)

위와 같이 파이썬 코드를 작성하면 티스토리에 비공개 글로 업데이트 된 것을 확인할 수 있다. 

테스트 결과


관련해서 여러 방식과 소개 자료가 있는데 결국 필요한 것은 access_token 정보 하나만 있으면 된다. 

access_token 얻는 방법을 알아 보자

+ Recent posts